


How To Organize Under Your Sink
Under-sink cabinets can be one of the most challenging spaces in your home to capitalize on. The pipes from the sink get in the way, items get lost in the back of the cabinet, there are questionable drips and spills, and you always (and I mean ALWAYS) seem to bang your head on the underside of the counter when exiting this dark abyss for a breath of fresh air.
But with a bit of clever organization and a little elbow grease, you can make your sink cabinets work for you.
Step 1: Purge
The first step in organizing is always purging. Take everything out. Every bottle, container, hair dryer, and roll of toilet paper needs to be removed to create a blank slate. If you haven’t used something in 6 months, it’s expired, or it doesn’t belong in that cabinet, GET RID OF IT. Donate unused items, recycle empty containers, and toss everything else.
Step 2: Clean
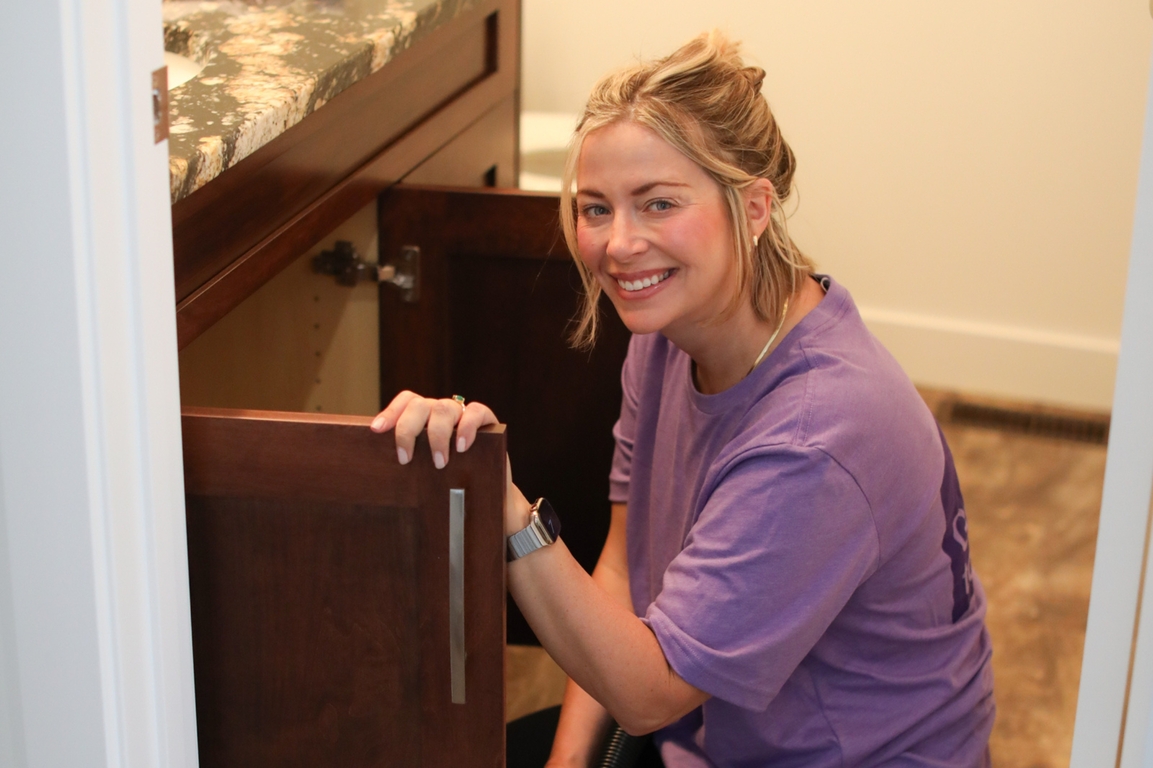
Cleaning comes next around here. Vacuum out the cupboard first using your hose attachment. Be sure to run it alongside the edges and corners to suck up any dust and grime that’s found its way into these cracks or along the hinges.
Next, fill your sink (or a bucket) with a gallon of hot water, ⅓ cup of bleach, and a teaspoon of powdered Tide®. Then wipe everything down until it sparkles. If you have spills, they might require some elbow grease.

You can make your life a little easier by putting down some adhesive-backed paper on the bottom of your cabinets (once clean and dry). This gives you a protective surface that’s inexpensive and simple to clean. If there are any stains or spills in the future, you can replace this liner with a fresh application and it’ll look as good as new.
Step 3: Organize
When you buy through our links, we may earn a small commission.
Next, decide how you want to organize your cabinet. Since there are likely many smaller items, containment and organization is the key. So instead of open shelves, go for pull-out drawers, turntables with removable sections, and stackable clear bins.
A pull-out shelf can make a world of difference in making everything accessible and not losing things at the back of your cabinet. (Measure first before ordering!)
Adjustable open shelves that work around the plumbing are another excellent choice.
A great budget-friendly option is using a tension rod across your cabinet to hang your cleaning bottles, cloths, or other items. This will raise them off the bottom of the cabinet to make room for other things. (It also helps keep the inside surfaces of your cabinets cleaner.)
Think outside of the box. Can you use the cupboard door? You can find great organizers to hang on the door for storing sponges, hair styling tools, etc. Use every inch to its full potential. But, at the same time, make sure you aren’t hanging onto anything you no longer need. Ideally, you land a little closer to the “minimalist” end of the spectrum than the “hoarder” end of things.
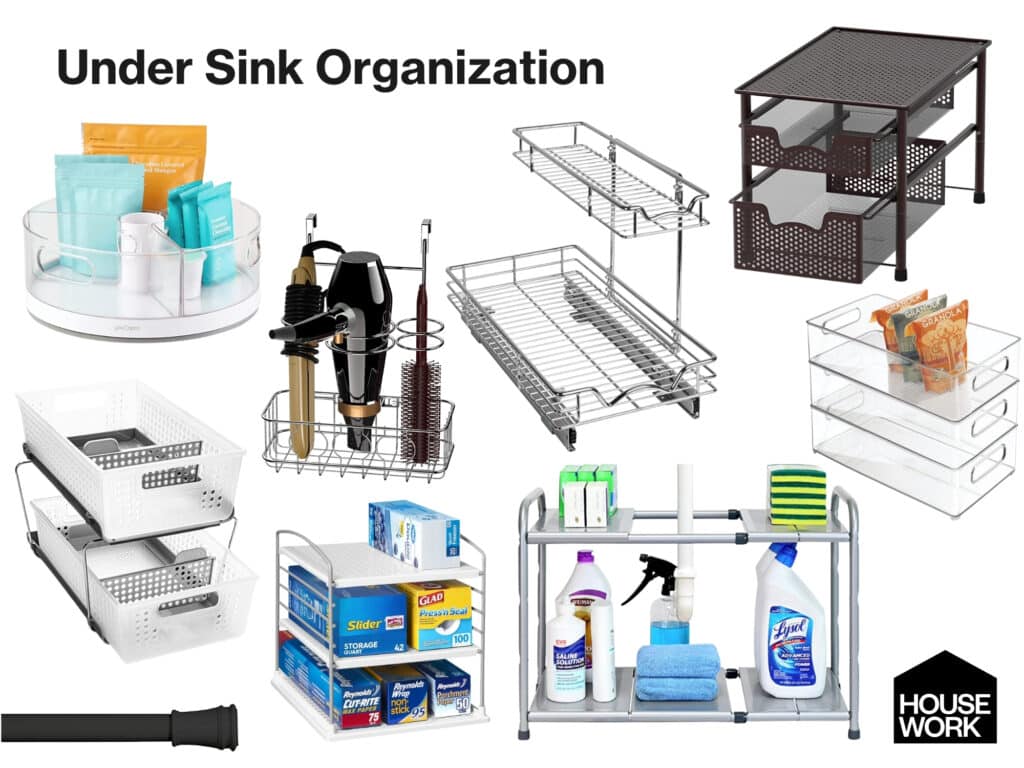
- Under sink organizer (Canada) (USA)
- Stackable 2 tier organizer (Canada) (USA)
- 2 tier organizer with dividers (Canada) (USA)
- Under sink pull out organizer (Canada) (USA)
- Adjustable box organizer (Canada) (USA)
- No Tools tension curtain rod (Canada) (USA)
- Over the cabinet organizer (Canada) (USA)
- Hair styling tools organizer (Canada) (USA)
- Lazy susan (assorted sizes) (Canada) (USA)
- Clear stackable rectangle bins (Canada) (USA)
Step 4: Keep it Up!
One of the hardest parts of organizing is keeping it that way. So when you use an item, PUT IT BACK where it belongs. Don’t just toss it back in willy-nilly, or all your hard work will go down the drain (pun intended) in about a week. And don’t forget to teach your partner and kids the system, too.

The good news is that it’s psychologically easier to keep a space clean once it’s already clean. In other words, if your cabinet is totally organized, you’re less likely to just throw an item in and shut the door. (On the flip side, if you have junk strewn across your cabinets, you’ll think, what’s one more thing?)
Every time I open a cluttered cupboard, I feel overwhelmed. But every time I open a clean, organized cupboard, I feel relaxed. Hopefully these tips and tricks will help you get your sink cabinets organized, and keep them that way so that you can have the same relaxed feeling.
For a list of our favorite products, click here.
– Becky @ GoCleanCo

We're big on Instagram.
Follow @GoCleanCo for seriously satisfying videos and top-secret tips. Don’t be shy, come say hi.
gocleanco
593 2,582,448
Sarah McAllister
Collabs: [email protected]
Cleaning expert plus I do some other stuff which is always a wild ride
My heart is full. Thank you @bissellcan @bissellclean for this amazing experience. I couldn’t even sleep last night I was just so excited about everything I learned. My mom being invited on this trip was a memory of a lifetime. I think she sorta understands what my job is now 😂 AND to you guys: THANK YOU! I only get to do this stuff because you trust me and are here cheering me on.
Happy 150th Birthday Bissell!!!!! @sarahsmomtrudy #hosted
My heart is full. Thank you @bissellcan @bissellclean for this amazing experience. I couldn’t even sleep last night I was just so excited about everything I learned. My mom being invited on this trip was a memory of a lifetime. I think she sorta understands what my job is now 😂 AND to you guys: THANK YOU! I only get to do this stuff because you trust me and are here cheering me on.
Happy 150th Birthday Bissell!!!!! @sarahsmomtrudy #hosted
I hate to tell you this, but your home might smell… 🤫
I hate to tell you this, but your home might smell… 🤫
I have bought this vacuum so many times, it is cheap (and it goes on sale a lot) — it doesn’t have a lot of bells and whistles but it works, especially if you are on a budget or if your vacuum isn’t quite picking up anymore. If you want the link, comment LINK and I’ll send it over.
I have bought this vacuum so many times, it is cheap (and it goes on sale a lot) — it doesn’t have a lot of bells and whistles but it works, especially if you are on a budget or if your vacuum isn’t quite picking up anymore. If you want the link, comment LINK and I’ll send it over.
Fruit flies multiplying faster than you can kill them? 🍎🪰
Here’s how to get rid of them AND stop them from coming back.
Comment LINK and I’ll DM you our full fruit fly guide + the Zevo trap I use.
Fruit flies multiplying faster than you can kill them? 🍎🪰
Here’s how to get rid of them AND stop them from coming back.
Comment LINK and I’ll DM you our full fruit fly guide + the Zevo trap I use.
The before-and-afters don’t lie 🫡 ✨
The before-and-afters don’t lie 🫡 ✨
Today we are talking all about mattress protection, pillows, duvets and bedding. Come watch my @amazonlive today at 9 am MTN/11 am EST plus it’s my birthday so come hang out with me in the comment section 🎂
COMMENT LINK and I’ll send you the link to watch via DM. I am also on the Amazon Live Fast Channel today! To watch the Amazon Live channel, just open Prime Video on your TV and search Amazon Live 📺 You can also watch on fire TV channels and the lifestyle section. #ad
Today we are talking all about mattress protection, pillows, duvets and bedding. Come watch my @amazonlive today at 9 am MTN/11 am EST plus it’s my birthday so come hang out with me in the comment section 🎂
COMMENT LINK and I’ll send you the link to watch via DM. I am also on the Amazon Live Fast Channel today! To watch the Amazon Live channel, just open Prime Video on your TV and search Amazon Live 📺 You can also watch on fire TV channels and the lifestyle section. #ad
How to clean sneakers for back to school 👟
How to clean sneakers for back to school 👟
How to clean backpacks; New year, same backpack. 🎒
Step 1: Empty all pockets
Step 2: Spot-treat stains with Dawn Powerwash
Step 3: Gently scrub the backpack with a brush
Step 4: Rinse
Step 5: Wash the backpack in the washing machine with towels or place it inside a laundry bag
Step 6: Follow the drying instructions on your backpack’s tag
How to clean backpacks; New year, same backpack. 🎒
Step 1: Empty all pockets
Step 2: Spot-treat stains with Dawn Powerwash
Step 3: Gently scrub the backpack with a brush
Step 4: Rinse
Step 5: Wash the backpack in the washing machine with towels or place it inside a laundry bag
Step 6: Follow the drying instructions on your backpack’s tag