


How to Deep Clean Nasty Tile Grout
There are parts of your home that you know are dirty the moment there’s a mess. White quartz countertops, for example, show cookie crumbs. And that stainless steel fridge with your child’s fingerprints streaking the front? Yeah, you can’t hide that. But then there are parts of your house that stealthily hide their filth. Tile grout certainly falls into this category.
Tile grout isn’t something that most homeowners spend time studying. In the grand scheme of things, it only makes up a very small percentage of the floor. And because it’s repeatedly stepped on and walked over, it tends to get dirty fast.
Pretty soon, that light gray or beige grout is a dark gray and you just get used to it. But that doesn’t give you a free pass. You need to clean your grout as part of your regular routine. And in this article, we’re going to show you how!
Prepping for Tile Grout Cleaning
Before you get on your hands and knees and start scrubbing, let us remind you that here at House Work, we have a very specific method to our madness – a method that’s critical to getting results.
Technically, there are 14 steps in our method. If you want to learn them all, grab a copy of The House Work Cleaning Guide. (It has a ton of other powerful tips, tricks, and recipes in there.) But for the purposes of cleaning tile grout, here are some of the most important steps:
- Pick one room to clean. If you have tile floors throughout your house, or multiple rooms with tile floors, don’t feel like you have to do them all at once. In fact, we always recommend picking one room to clean at a time. This prevents you from feeling overwhelmed and allows you to focus on quality over quantity. Once you get that room clean, you can move on to the next one.
- Go left to right and top to bottom. There has to be some order within the room. We prefer to work left to right and top to bottom. This means the tile floor/grout will be the last thing you clean in the room. (We recommend this because dust and grime will fall to the lowest surface. If you start with the floors and then work your way up, they’ll be dirty again by the time you finish).
- Clear everything out. Get everything out of the way. This includes furniture, shoes, plants, and anything else that’s preventing you from having access to every square inch of the tile and grout.
How to Actually Clean the Grout
Okay, now that you’re ready to clean, let’s dig into the actual step-by-step process of how to clean grout:
When you buy through our links, we may earn a small commission.
Step 1: Vacuum, Don’t Sweep
This is going to change your life. We don’t sweep, period. Pull out the vacuum (Canada) (USA) and suck up all of that dirt, lint, dust, and hair. (Sweeping won’t cut it and we do things right the first time around here.)
Take the hose attachment and run it along baseboards, and any small crevices that the vacuum might not be able to reach. You’ll be amazed at how much easier it is to mop and wipe down surfaces after you’ve hit them with a vacuum.

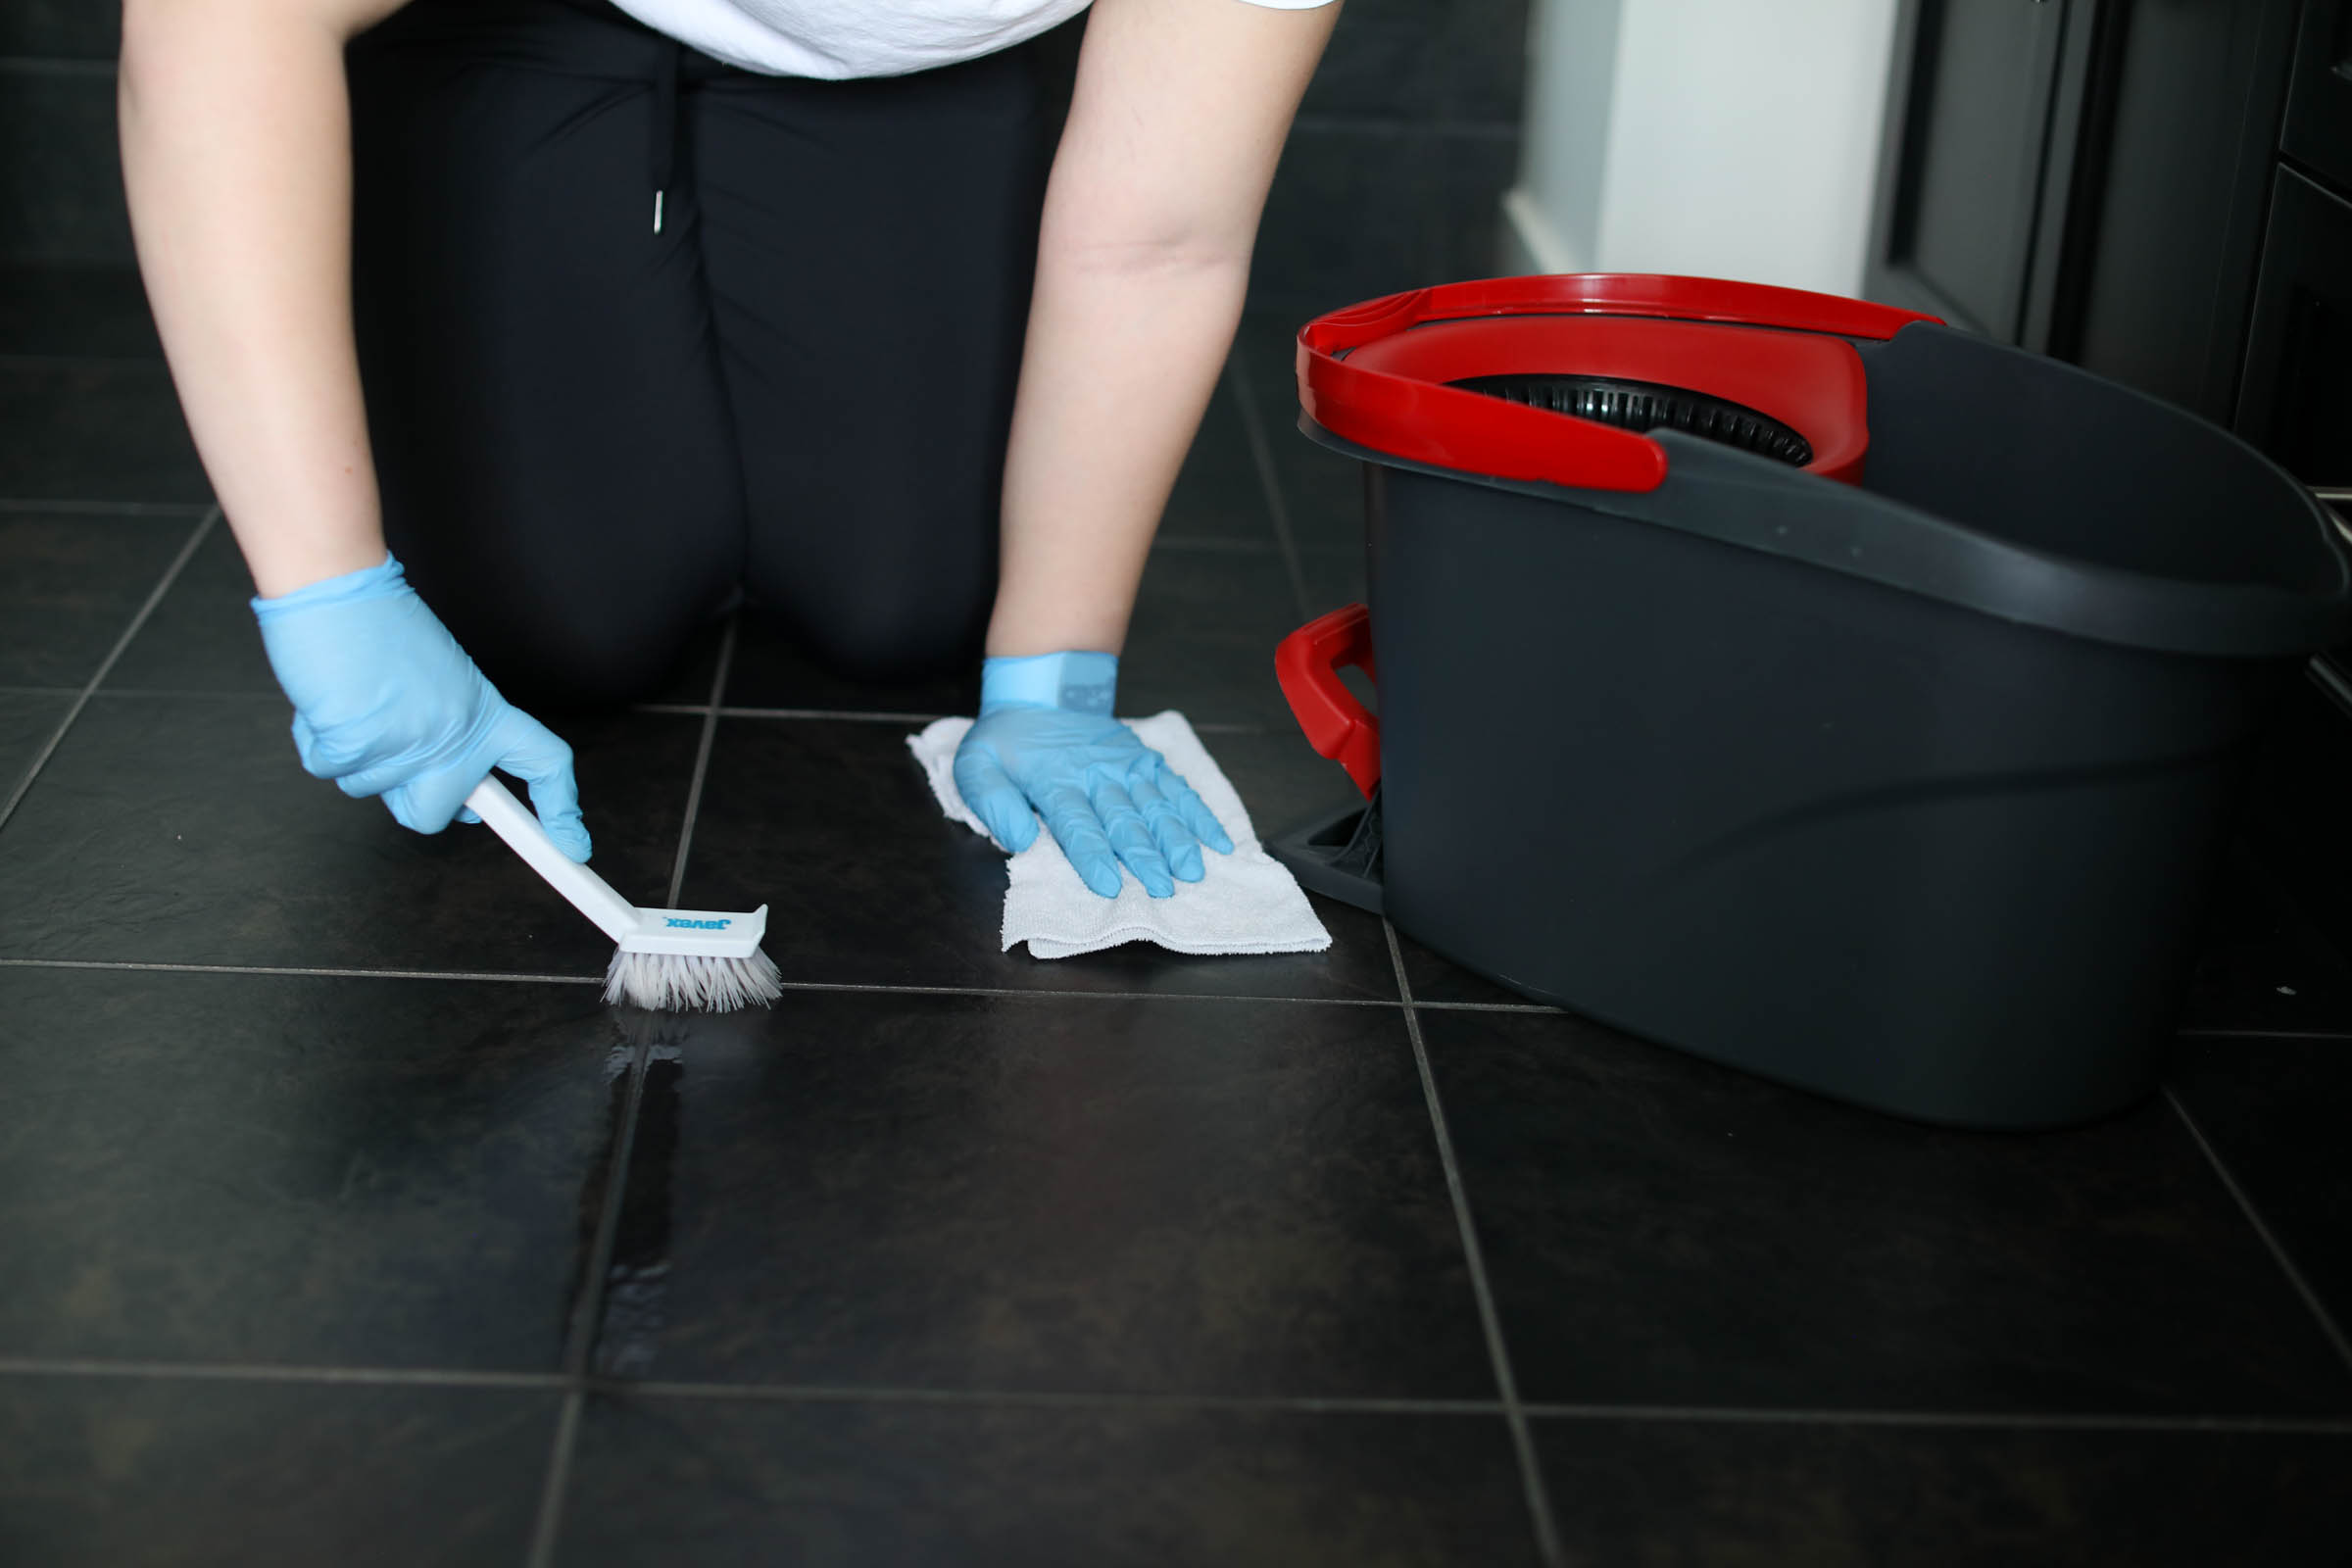
Step 2: Scrub the Grout
For porcelain or ceramic tile, use a concentrated mixture of powdered Tide® (2-3 teaspoons), bleach (1 cup) and hot water (¼ gallon or 4 cups). The more concentrated, the faster and better the product will work and the less scrubbing you will need to do. DO NOT USE BLEACH for natural stone tile as it may cause permanent etching.
Using the mixture you just made, grab a plastic-bristle brush or toothbrush and start scrubbing the grout lines with a liberal amount of the Tide® recipe. You should start to see some of the stain lift as the water turns a dark gray or brown color. Absorb the excess with a clean microfiber cloth. (All items mentioned can be found right here → USA + Canada)

Step 3: Mop the Floor
Once the grout has been cleaned, it’s time to mop the floor with a gallon of hot water, 1 teaspoon of powdered Tide®, and ⅓ cup bleach (optional). Then, let the floors dry.

Step 4: Vacuum (Again)
Once the floors have dried, it’s time to vacuum again. Pull out the vacuum and run it across the tile. Use the hose attachment to get into the crevices and other hard-to-reach areas. This might seem like overkill, but it’s this step that ensures you’re left with sparkling tile and grout. Take your time and finish the job well. (Then go pour yourself a glass of wine and kick your feet up for the rest of the day.)
**Note: If cleaning grout in a shower, you can use this same method, though there’s no need to mop.
Pro Tips for Cleaner Tile Floors
Truth be told, you can save yourself a lot of time and effort by proactively doing a few small things upfront. Here are some additional “pro tips” to keep in mind:
- We highly recommend sealing your tile and grout. Most builders and homeowners don’t do this, so it’s up to you to make it happen. Doing so will save your grout from staining and crumbling over time. It’s a pretty easy process that requires picking up a solution from the store and applying it. Make sure you read the label and follow manufacturers instructions.
- You can save yourself many headaches (and copious amounts of elbow grease) by choosing a dark grout to begin with.
- There are SO many different types of stone and tile on the market. Each of these products has certain cleaning ingredients and chemicals that can and cannot be used. Always, always, always read labels and do your research so that you don’t ruin your tiles.
Embrace the Clean
At House Work, we’ve got your back. Whether you’re a brand new homeowner who is tasked with keeping your house clean for the first time ever, or someone who is finally looking to get your sh*t together and keep your house clean…we’re here to help.
We also have a selection of House Work Cleaning Guides that you can purchase in a variety of formats, including hard copy and digital.
For a list of our favorite products, click here.


We're big on Instagram.
Follow @GoCleanCo for seriously satisfying videos and top-secret tips. Don’t be shy, come say hi.
gocleanco
581 2,583,465
Sarah McAllister
Collabs: [email protected]
Cleaning expert plus I do some other stuff which is always a wild ride
How to clean a silgranit sink.
Comment SINK and I’ll send you the cleaning method for all the other sinks 📖
How to clean a silgranit sink.
Comment SINK and I’ll send you the cleaning method for all the other sinks 📖 ...
Things that are worth the money: Cleaning Edition
Things that are worth the money: Cleaning Edition ...
Don’t tell @sarahsmomtrudy 👀
Don’t tell @sarahsmomtrudy 👀 ...
How to clean your bins and keep bugs and animals out of them.
One step I forgot to show here was I poured some Pine-Sol in the bottom of the bins to soften the gunk and filled with a bit of water and let them soak for an hour in the sun!
how to keep flies out of trash, how to clean trash and garbage bins
How to clean your bins and keep bugs and animals out of them.
One step I forgot to show here was I poured some Pine-Sol in the bottom of the bins to soften the gunk and filled with a bit of water and let them soak for an hour in the sun!
how to keep flies out of trash, how to clean trash and garbage bins ...
Monday morning ☕️ anyone?
Monday morning ☕️ anyone? ...
Come find my custom DIRTY SODA on the Secret Influencer Menu at the @covet.sips.sweets at the Calgary Stampede from July 3–12.
Dirty Bastard by @gocleanco
• Coke Zero, extra ice
• A splash of fresh raspberry purée
• A splash of peach purée
• Two fresh lime wedges
• Finished with a drizzle of coconut cream
It’s sweet, tart, creamy, fizzy — tastes just like summer.
If you’re headed to Stampede, order my Dirty Soda, you dirty bastards. 🤠🥤
#CalgaryStampede #DirtySoda #Stampede2026
Come find my custom DIRTY SODA on the Secret Influencer Menu at the @covet.sips.sweets at the Calgary Stampede from July 3–12.
Dirty Bastard by @gocleanco
• Coke Zero, extra ice
• A splash of fresh raspberry purée
• A splash of peach purée
• Two fresh lime wedges
• Finished with a drizzle of coconut cream
It’s sweet, tart, creamy, fizzy — tastes just like summer.
If you’re headed to Stampede, order my Dirty Soda, you dirty bastards. 🤠🥤
#CalgaryStampede #DirtySoda #Stampede2026 ...
Screen time said I averaged 25 hours a day….wut
Screen time said I averaged 25 hours a day….wut ...
Its tiiiiiiiiiiiiiiiiime!!!!!!!!!!!!!!
*something glitched in the workshop had to repost —Santa Sarah 🎅🏻
Its tiiiiiiiiiiiiiiiiime!!!!!!!!!!!!!!
*something glitched in the workshop had to repost —Santa Sarah 🎅🏻 ...